1.1 Installing On Windows Machines
These instructions are intended for use on personal machines running the Windows OS. While these instructions have been used to install the R toolchain on several machines, each of the steps may not be applicable for every version of the OS. We welcome input on ways to improve these instructions so that they are more widely applicable. Therefore, if any errors are discovered in these instructions, please open an issue detailing the problem.
1.1.1 Install The R Environment
Go to https://cloud.r-project.org/ and download latest version of R
During the installation process, accept all of the defaults
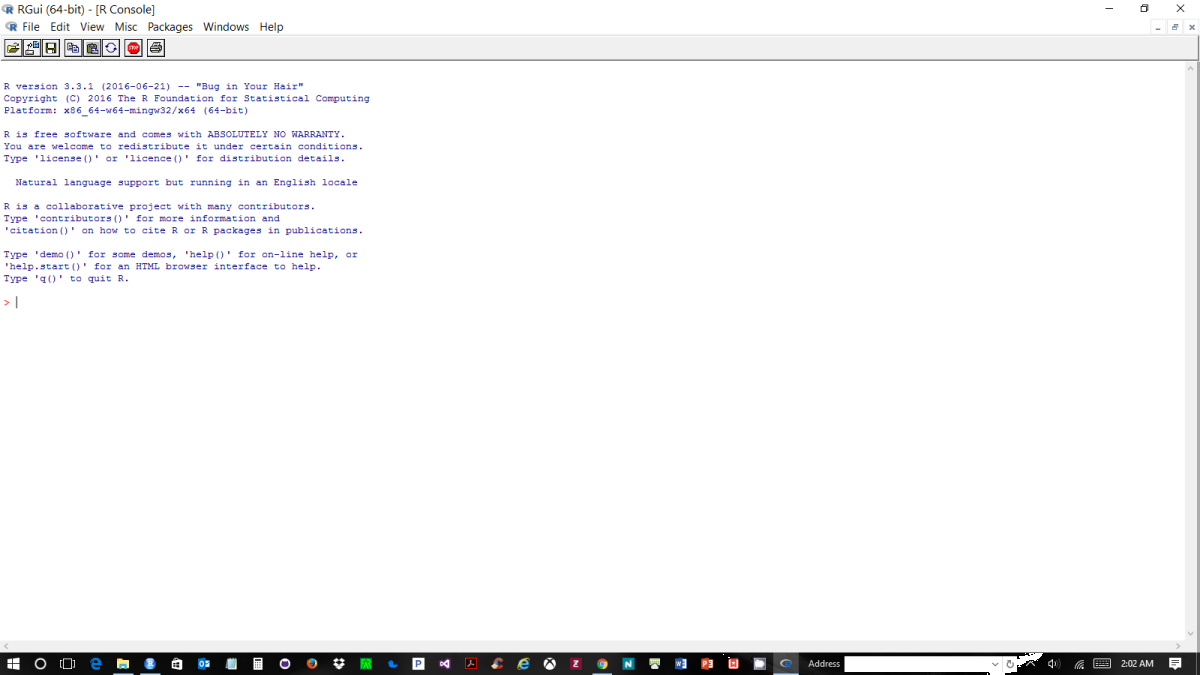
Once the install is complete, open R - your installation should look similar to the image below. Admittedly, it’s not very exciting to look at - we’ll fix that soon once RStudio is installed.
At the command prompt type
.libPaths()This function returns the directory(ies) where R can store your downloaded packages
As you’re installing R for the first time, there may be only one directory listed now - as you use R, the number of directories is likely to increase
The order of the directories indicates the order R will use in trying to store the package
A custom library may be specified by creating an environment variable called
R_LIBSand assigning it the path of the desired folder
Now type
names(installed.packages()[,1])This returns a list of the packages that installs with the R environment
These packages are stored in the first directory returned by
.libPaths()
1.1.2 Install R Packages
The real power of R is experienced by using AND creating packages. Packages ‘add-on’ to the power of R in the same way that apps add to your smartphone (For most cases, there’s an app a package for that!). Creating packages allows researchers to quickly share their work with the world. Using packages allows researchers to incorporate cutting-edge capabilities, as soon as they’re developed.
There are also several ‘stores’ or repositories from which packages can be installed.
The Comprehensive R Archive Network (CRAN) - the official repository for R packages
GitHub - many packages are stored here prior to being accepted for publication to the CRAN
Bioconductor - a repository of bioinformatics-related R packages
The Microsoft R Archive Network (MRAN)
Let’s install a package to make sure everything is working
Run
install.packages('data.table')to install thedata.tablepackage from the CRANIf this is your first package, you may be asked to choose a ‘CRAN mirror’ - select
0 - CloudYou may also be asked if you’d like to create a personal library - if so, select
Yesand accept the default folder locationAt this point the
data.tablepackage should download as shown in the GIF below
If the package failed to download, skip ahead to Install RStudio and try to install the
data.tablepackage after RStudio is installedIn addition to the
data.tablepackage there are several packages every R user needsTo install these packages paste the following lines into the console
install.packages(c('devtools','rmarkdown','installr'))install.packages(c('DT','knitcitations','RefManageR'))install.packages(c('shiny','RJSONIO','xtable'))
If these packages (and their dependencies) install - move on to Install RStudio
1.1.3 Install RStudio
RStudio is, by far, the most popular integrated development environment (IDE) for the R programming language. Other popular IDE’s that can be used with R include: Emacs, Microsoft R Open, Notepad++, Eclipse, and Knime. RStudio installs with several open-source applications and provides
R (*.R)
Matlab (*.m)
Python (*.py)
Julia (*.julia)
C++ (*.cpp)
JavaScript (*.js)
JSON (*.json)
CSS3 (*.css)
HTML5 (*.html)
YAML (*.yml)
Markdown (*.md)
Coffee (*.coffee)
During the previous step you attempted to install the
installrpackage from the CRANWe can verify that the package installed successfully by running
"installr"%in%installed.packages()in the R consoleIf the returned value is
TRUEyou’re all set, skip down to 3)If the returned value is
FALSEskip down to 4)
With the
installrpackage RStudio may be installed from within R by runninginstallr::install.rstudio()Without the
installrpackage RStudio can be installed from HEREOnce installed, open RStudio to ensure it’s linked with the your installed version of R
If your R installation is found, RStudio will open - no news is good news
If your R installation is not found, RStudio will fail to open
If this happens, close RStudio and try re-installing R
Once R has been successfully re-installed try to open RStudio again
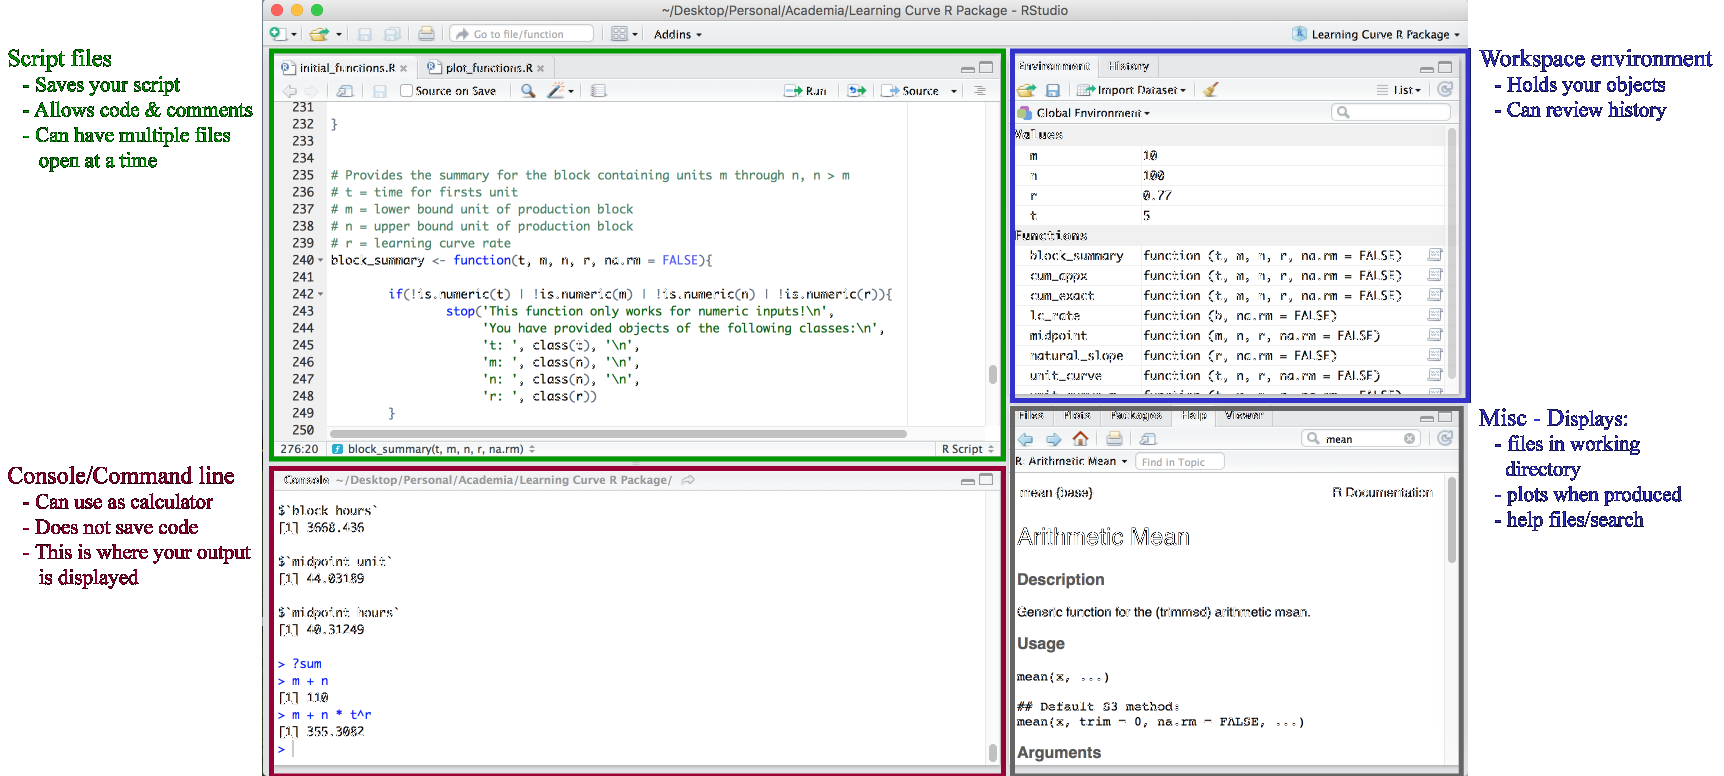
The completed RStudio installation should look similar to the image below
1.1.4 Install LaTeX
A \(\LaTeX\) distribution is required to produce PDF documents. On Windows, MiKTeX is the required \(\LaTeX\) program to work with RStudio.
With the
installrpackage, MiKTeX may be installed from within R by runninginstallr::install.miktex()Without the
installrpackage MiKTeX can be installed from HERENote: Choose the option to
Install Packages on the FlyOtherwise accept all the defaults
Once MiKTeX has finished installing, ensure it’s configured correctly by following the steps below
Select ‘File’ > ‘New File’ > ‘R Markdown’ to create a new R Markdown file
In the ‘Document’ dialog choose ‘PDF Document’
Once the demo file opens, click
knitto knit the rmarkdown file into a PDF documentYou’ll be asked to give the new file a name, choose something simple, like ‘test’
Note: The first time you knit an rmarkdown document knits into a PDF it can take a moment to compile as several LaTeX packages may need to be installed in the background.
If a pop-up window appears, asking permission to install a \(\LaTeX\) package, check the default location of the package repository and allow the package to install
1.1.5 Install Rtools
Mac/UNIX/Linux all include a native set of tools to work with pre-compiled languages (C, C++, FORTRAN). These tools are required for building and installing R packages. Windows does not include these tools, which ordinarily would have to be installed one-by-one. Thankfully, the R Core Team has assembled the Rtools suite to provide this capability. Note, Rtools is not a package! Rather, Rtools is a suite of compiling programs that are distinct from R.
With the
installrpackage, Rtools may be installed from within R by runninginstallr::install.rtools()Without the
installrpackage Rtools can be installed from HEREClick on the latest version available, currently
Rtools34.exeto downloadNote the directory in which Rtools will be installed, typically this is
c:\RtoolsOn the checkboxes, the ‘Extras’ do not need to be checked - unless you want to rebuild R itself
If you have never installed Rtools before, make sure the ‘edit the system path’ box is CHECKED
Review the list of entries on your system path, the first two should read
c:\Rtools\binc:\Rtools\gcc-4.6.3\bin
If these entries are listed in your path, click OK - and Rtools should begin installing
After the install completes, run
devtools::find_rtools()to ensure that R can find RtoolsIf this function returns
TRUEgo on to Install \(\LaTeX\)If this function returns
FALSEfollow the steps below to edit the system pathGo to Start and perform a search for ‘Environment Variables’
If you have admin rights, choose
Edit the System Environment Variablesotherwise chooseEdit Environment Variables For Your AccountWhen the window opens click the
Environment VariablesbuttonFind the variable named
Path\(\rightarrow\) and click Edit \(\rightarrow\)On Windows 10, the path is shown as a bulleted list - Add two new entries at the top
c:\Rtools\binandc:\Rtools\gcc-4.6.3\binOn Windows 8.1 and earlier the path is shown as string, separated by ‘;’ - paste the following to the beginning of the path
c:\Rtools\bin;c:\Rtools\gcc-4.6.3\binIf the
Pathvariable doesn’t exist or isn’t editable clickNew\(\rightarrow\) create a new variable calledPath\(\rightarrow\) assign the valuec:\Rtools\bin;c:\Rtools\gcc-4.6.3\binOnce again, run
devtools::find_rtools()if this still returnsFALSEcheck the directory in which Rtools is locatedThe path entries should lead to the
Rtools\binand theRtools\gcc-4.6.3\binfolders, wherever they are installed on your machineOnce the command
devools::find_rtools()returnsTRUE, proceed to Install \(\LaTeX\)
1.1.6 Create a GitHub Account
Go to GitHub.com and sign up for an account
Choose a username
Add an email address
Enter a password
Once you’ve logged in, perform a search for
Auburngrads.GitHub will provide results for all public repositories, files, and user account names containing the search phrase.
There should only be one account named
Auburngrads- select this to be taken to Auburngrads’ main page.Every GitHub user has a main page showing an overview of their most recently updated repositories (‘repos’). To see Auburngrads’ full list of public repos, click the repositories link.
Within the list of Auburngrads’ repos, find the one called
test-repoand click the link to go to theAuburngrads/test-repopage.Every public GitHub repo has its own dedicated page listing the files contained within, when each file was most recently updated
On the
test-repopage click to fork a copy of the repo to your account
1.1.7 Install & Configure Git
With the
installrpackage, Git may be installed from within R by runninginstallr::install.git()Without the
installrpackage Git can be installed from HEREOnce the install completes, close and re-open RStudio
Open the ‘Tools’ menu and select ‘Global Options’
In ‘Global Options’ select ‘Git/SVN’
If the ‘Git Executable’ window is blank click ‘Browse’ and navigate to
C:\Program Files\Git\bin\bin.execlick OKIf the path to
git.exeis already listed in the ‘Git Executable’ window, Git has been installed correctly
Next, we’ll make sure Git is configured
Open Start and search for the ‘Git Bash’ application, open the application and type the following two lines
git config --global user.name your.github.usernamegit config --global user.email your.github.emailClose Git Bash
Finally, let’s set up the SSH connection between RStudio and GitHub
Open ‘Tools’ \(\rightarrow\) ‘Global Options’ \(\rightarrow\) ‘Git/SVN’
Toward the bottom of the ‘Git/SVN’ dialog click ‘Create RSA Key’
After the RSA Key appears click ‘Close’
Click ‘View Public Key’ and copy the text in the window
Return to your GitHub.com account page and click the drop-down arrow next to your account avatar (upper-right corner) \(\rightarrow\) select ‘Settings’
Under ‘Settings’ select ‘SSH and GPG Keys’
Select ‘New SSH Key’ \(\rightarrow\) choose a name for the key, like
personal machinePaste the public key in the window and select ‘Add SSH Key’
1.1.8 Create & Link an R-Project
Click
 and select ‘New Project’
At the menu select ‘Version Control’ and then ‘Git’
Enter the url for your fork of the
test-reporepositoryIf you’ve set-up SSH enter the url as
git@github.com:your.user.name/test-repo.gitIf you have not set up SSH enter the url as
https://github.com/your.user.name/test-repo.git
Select ‘OK’ and Git will clone the
test-repoto your machineOnce the project opens, edit the
README.mdfile and commit the changesAdd your initials to the list of initials and save the file
Find the project tabs
 in the upper-right pane of RStudio
Select the ‘Git’ tab
The
README.mdfile should be listed as a changed fileClick the checkbox next to the filename and then click ‘Commit’
In the Commit dialog, enter a short message in the window detailing the changes you made and click
Commit
Now that the changes have been committed they need to be
Pushedso that their online counterparts matchClose the
Commitdialog and pressPushA window may appear asking for a username and password - ignore this.
After the
Pushis complete a message will appear indicating that the changes have been synced to the Master branch
Submit a
Pull-Request
to sync the changes in your forked version oftest-repoto my original version oftest-repoNavigate to the
test-reporepository page under your accountSelect Pull requests \(\rightarrow\) ‘New Pull Request’
Git will perform a
Diffto determine which files have been changedAs only the README.md file is changed between the two repos this should be the only file listed.
Select ‘Create Pull Request’
Once the pull request is finished - so is the process to build R/RStudio toolchain for data science